

Photo by Lautaro Andreani on Unsplash
React Native Environment Setup/Work Space
Efficiently Preparing Your React Native Workspace


Table of contents
Hey there, I will help you develop your first and foremost React app
React Native: a JavaScript framework developed by Facebook to help you build your app using the React library.
Setting up
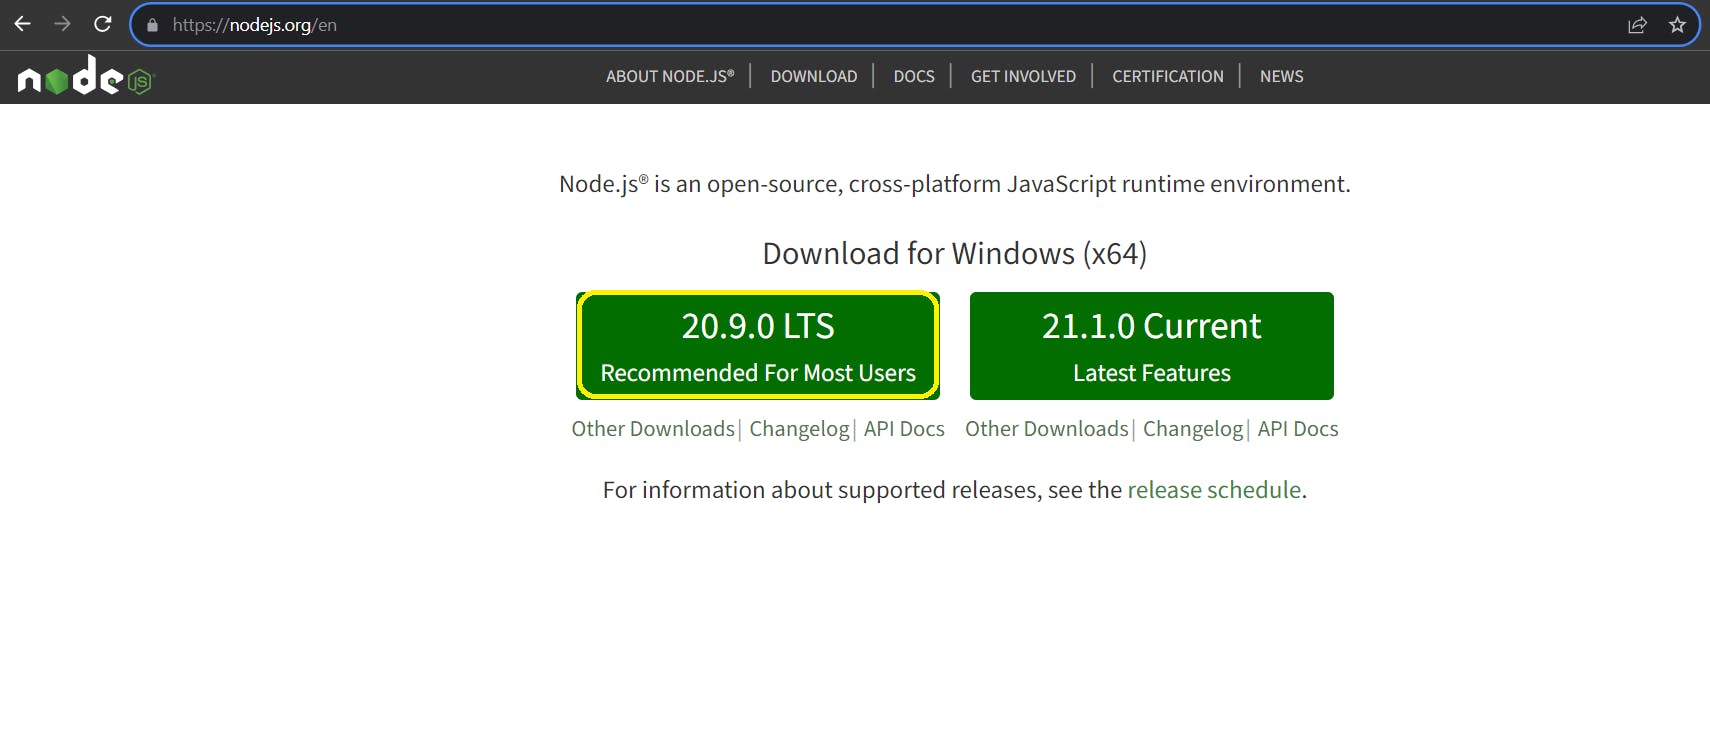
Download node.js from the official website. The LTS version of node.js recommended
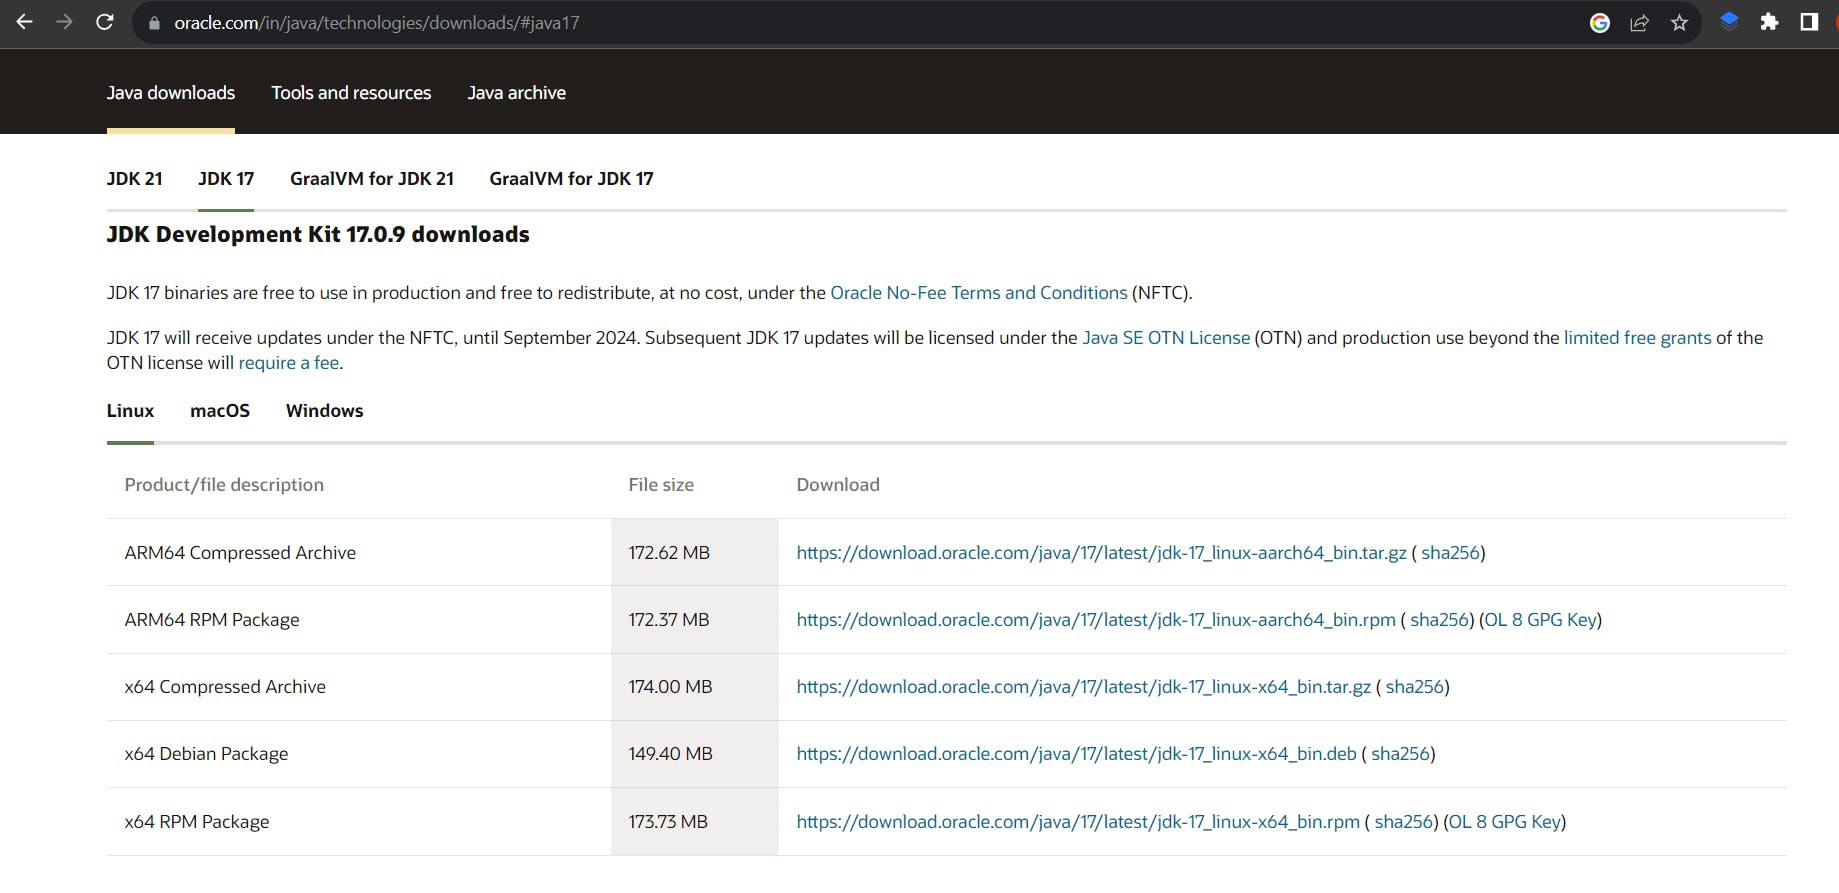
Download Any Java/JDK (Java development kit). I prefer Java from Oracle
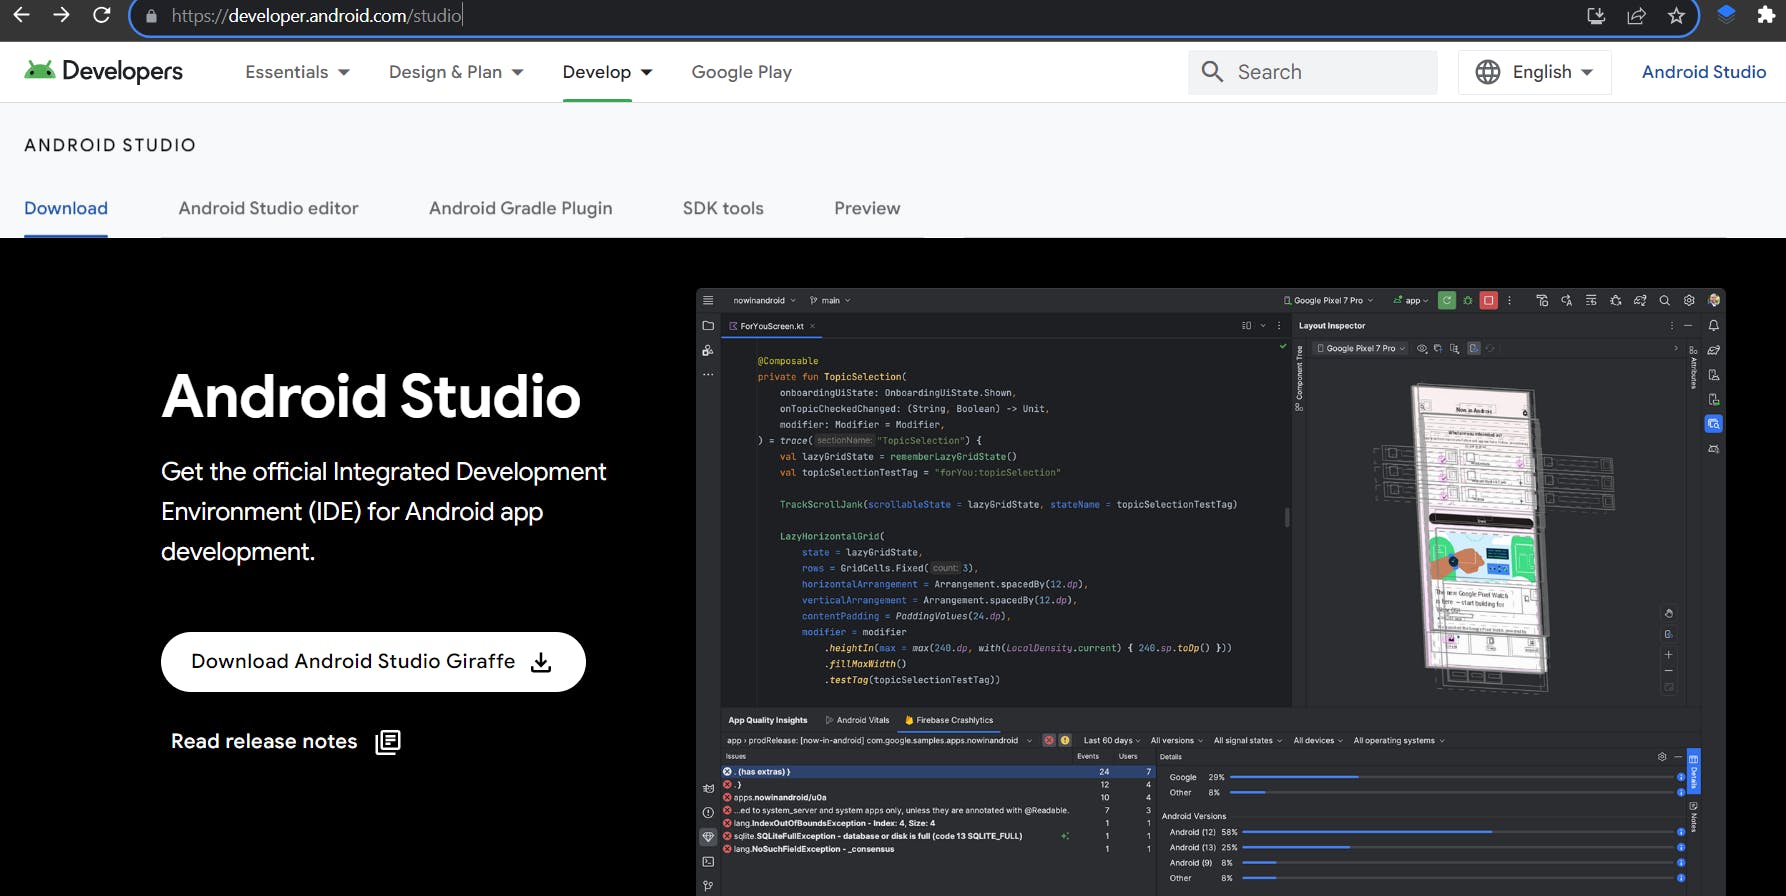
Download Android Studio from the official website
after installing Android Studio. You need to set the path for Android Studio.
We need to do two things in Android Studio, there are
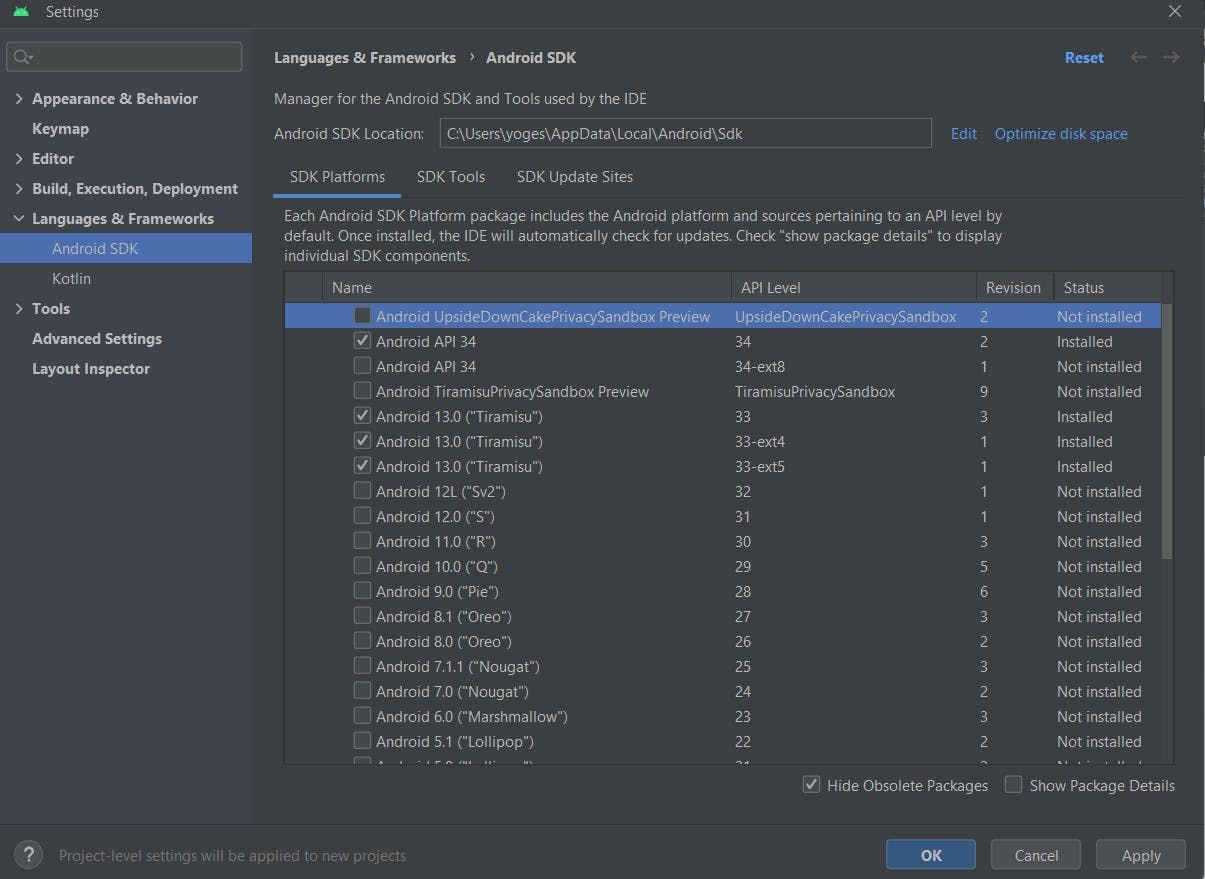
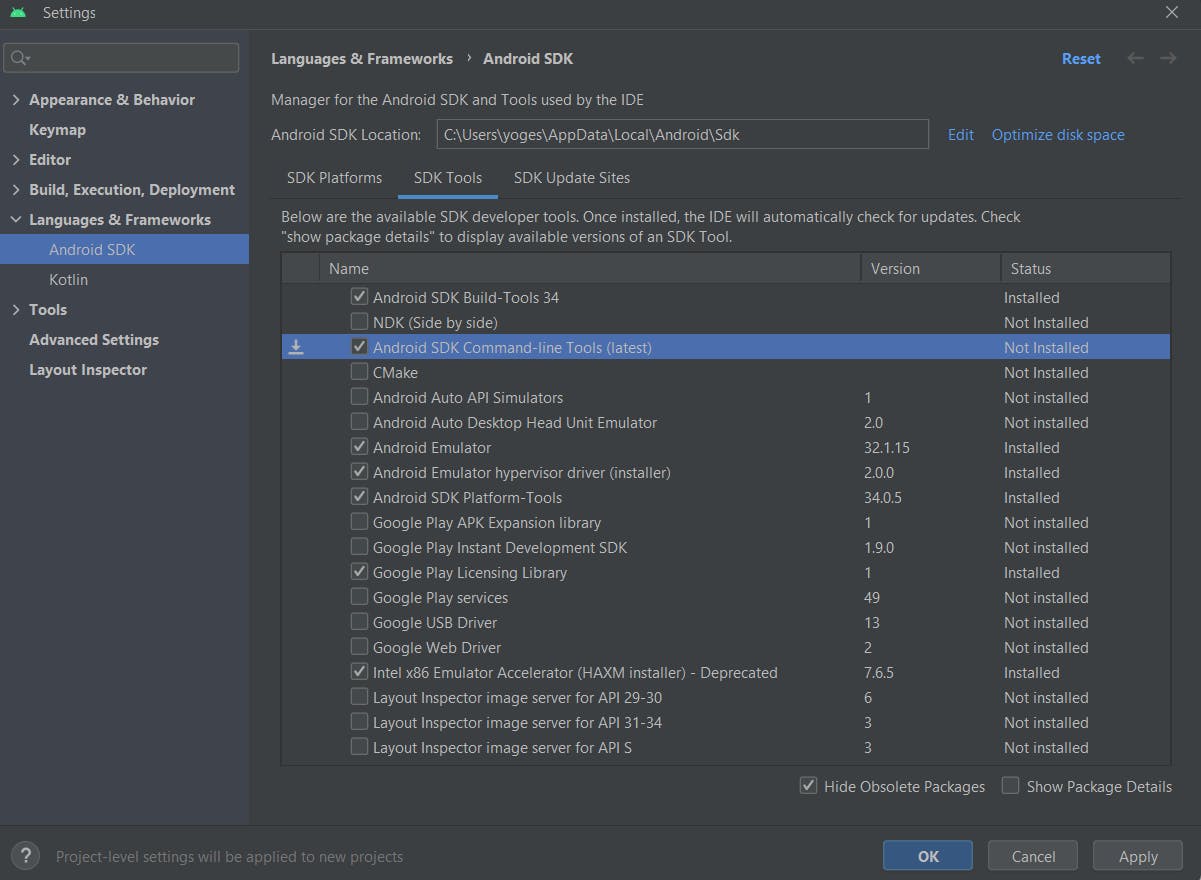
SDK manager:
- Tick the boxes android API 34 tools and android 13 tiramisu 33 in platforms Tab and tap apply.
Tick the boxes Android SDK build tools, CLI tools, Android emulator, Android SDK platform tools and Google Play Licence library must be ticked in SDK tools tab.
Virtual device manager:
open the virtual device manager and then click create a Device and choose the device and then click next
Download the image, preferably Tiramisu 33.
Click the play button to run the virtual device.
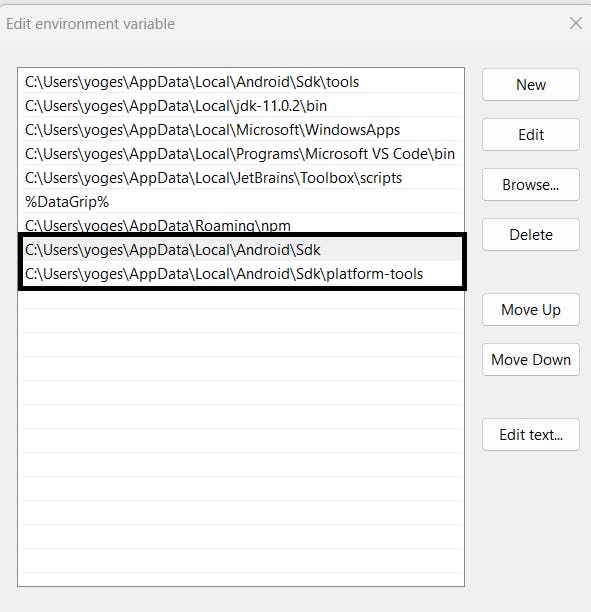
Windows
- Open settings/press Win key and then type Environment variables > path > new and set path.
Linux
To set the path for Android Studio on Linux, you'll need to update the PATH environment variable to include the Android SDK tools and platform-tools directories. Here's how to do it:
Open the terminal and navigate to your home directory using the
cdcommand.cd $HOMEOpen the
.bashrcfile using a text editor like nano or vim. You can use the following command to open the file with nano:Bash Script
nano .bashrcAdd the following lines to the end of the
.bashrcfile:Bash Script
 export ANDROID_HOME=~/Android/Sdk
 export PATH=$PATH:$ANDROID_HOME/tools:$ANDROID_HOME/platform-tools
Make sure to replace
~/Android/Sdkwith the actual path to your Android SDK directory.Save the
.bashrcfile and exit the text editor. For nano, press Ctrl+O to save and Ctrl+X to exit.Reload the
.bashrcfile to apply the changes using the following command:Bash Script
source ~/.bashrc
Now, the Android SDK tools and platform tools should be available in your path to work effectively.
Mac
If you're using zsh as your default shell on macOS, you'll need to modify the
.zshrcfile instead of.bashrc. Here's how to set the path for Android Studio on macOS with zsh:Open the Terminal application.
edit the
.zshrcfile using a text editor like Nano or Vim. You can use the following command to open the file with Vimvi ~/.zshrcexport ANDROID_HOME=~/Library/Android/sdk export PATH=$PATH:$ANDROID_HOME/tools:$ANDROID_HOME/platform-toolsMake sure to replace
~/Library/Android/sdkwith the actual path to your Android SDK directory.Save the
.zshrcfile and exit the text editor. For nano, press Ctrl+O to save and Ctrl+X to exit.Reload the
.zshrcfile to apply the changes using the following command:zsh.
source .zshrc
Code Editor
This is the last and most important step in development. Choose the best code editor that suits your workflow
I prefer Vscode for your React Native development Environment.
Install vscode from the official website
add a template plugin that helps you in lots of situations that was ES7+ React/Redux/React-Native snippets to download this just search this in the vscode plugin tab
Last words, this is the way I setup my development lab, and it helps you build more robust apps with React Native. For more interesting information about React Native and development, follow me 👍.